Красивая галерея с сортировкой на JQuery. Веб-дизайн и поисковая оптимизация Простая галерея jquery с миниатюрами
Сегодня мы рассмотрим jQuery плагин Flipping Gallery, который позволяет создавать классные галереи изображений с очень оригинальными переходами. В примере есть 5 видов переходов с использованием данного плагина. Плагин действительно очень прост в использовании, поэтому любой сможет с ним полноценно работать.
Пример можно увидеть здесь:
Скачать
Мы рассмотрим более подробно как создать меню из Демо 2 , когда меню появляется слева вверху.
HTML часть
Сперва необходимо подключить библиотеку jQuery, которую можно скачать здесь и плагин Flipping Gallery , между тегами :
| 1 2 3 4 5 6 | <head > ... <"http://code.jquery.com/jquery-1.9.1.js" > <script type = "text/javascript" src = "http://code.jquery.com/jquery.flipping_gallery.js" > ... </ head > |
Затем располагаем изображения. Вы можете добавлять столько изображений, сколько пожелаете:
| 1 2 3 4 5 6 7 8 | <div
class
=
"gallery"
>
<a
href
=
"#"
> |
А чтобы добавить описание для изображений(как в демо 4 и 5) необходимо использовать атрибут data-caption :
| 1 2 3 4 5 6 7 8 | <div
class
=
"gallery"
>
<a
href
=
"#"
data-caption=
"Очень"
> |
JS часть
| 1 2 3 4 5 6 7 8 9 | $(".gallery" ) .flipping_gallery ({ direction: "forward" , selector: "> a" , spacing: 10 , showMaximum: 15 , enableScroll: true , flipDirection: "bottom" , autoplay: 500 } ) ; |
Рассмотрим что означает каждый метод:
- direction — метод отвечающий за то, как будут появляться изображения. Если «forward», то изображение из начала будет помещаться в конец, если «backward» — наоборот. По умолчанию значение задается «forward».
- selector — селектор по которому выбираем изображения, его можно изменить по желанию.
- spacing — задает отступ между изображениями в перспективе.
- showMaximum — задает количество изображений, которые видны пользователю. Можно использовать хоть 100 изображений, но показываться будут только первые 15, что очень удобно и не нагружает браузер.
- enableScroll — можно просматривать изображения используя колесо мыши.
- flipDirection — определяет куда будет скользить изображение: «left» — влево, «right» — вправо, «top» — вверх и «bottom» — вниз. По умолчанию оно скользит вниз.
- autoplay — автозапуск галереи. Задается в милисекундах, т.е. через сколько будут сменяться изображения.
Вывод
Теперь у вас есть великолепная галерея, которую можно использовать при размещении своих фотографий.
Здравствуйте, уважаемые читатели a! В этом уроке я покажу Вам, как создать минималистичную, но в тоже время удобную и функциональную фото галерею на jQuery , или галерею изображений, кому как удобно. В галерее есть возможность создавать категории, с последующей фильтрацией. Так же есть возможность запуска слайд-шоу. Галерея работает во всех браузерах, так что проблем с адаптацией не будет.
Для создания этой галереи будут использованы две бесплатные библиотеки : Quicksand и PrettyPhoto . Они значительно упрощают создание галереи. Как всегда результат работы Вы можете увидеть на демонстрационной странице, а также скачать архив с работающей галерей и все исходные файлы. Единственным минусом, если можно так сказать, является создание в ручную миниатюр для больших изображений. А во всем остальном эта галерея достойна внимания. Так же как и !
HTML разметка
Сначала разберем панельку со списком категорий, это маркированный список ul . Причем у каждого элемента списка должно быть уникальное имя класса.
1 |

Как говорилось выше, элементы списка это изображения в галерее. Каждый элемент списка включает составные. Это непосредственно само изображение, точнее его миниатюра, а также описание. Миниатюра представляет собой ссылку на основное изображение. Атрибут rel необходим для вызова javascript и открытия основного изображения.
Не забывайте также о 2 важных вещах, у элемента списка li атрибут data-id должен быть уникальным. Атрибут data-type содержит класс категории, список которых я описывал выше. О разметке вроде бы все.
Стили CSS
Особо заострять внимание на стилях не буду, так как используем мы уже готовую библиотеку PrettyPhoto , которая отвечает за увеличение изображения, и css кода достаточно много. Однако стоит заметить предусмотрено 5 вариантов оформления увеличенного изображения, хотя в идеале всего 3 , так как в двух вариантах лишь убирается закругление.
Поэтому, покажу лишь CSS стили для миниатюр ну и списка категорий.
1 | Portfolio-categ
{
margin-bottom
:
30px
;
}
|
В принципе, со стилями должно быть все понятно. Чтобы категории выстроились в ряд свойству display придается значение inline . Для того чтобы придать эффект обводки изображения, задается фоновый цвет (белый) и отступ в 10 пикселей. Размеры элементов списка задаются в .portfolio-area li .
jQuery
Ну и напоследок самое важное, то ради чего весь урок. Это jQuery код. Начнем с фильтрации картинок, по категориям.
1 | // Выбираем все дочерние элементы portfolio-area и записываем в переменную
$(".portfolio-categ li"
)
.click
(function
(e)
{
var filterClass= $(this ) .attr ("class" ) .split (" " ) .slice (- 1 ) [ 0 ] ; if
(filterClass ==
"all"
)
{
LightboxPhoto()
;
|
C помощью метода clone() и селектора, выбираем все дочерние элементы у .portfolio-area и записываем их в переменную $data . Далее отслеживаем клик по одной из категорий, элемент li у списка с классом .portfolio-categ . Делаем все категории не активными, посредством удаления removeClass(«active»), если этого не делать то со временем все категории будут активными и фильтрация остановиться.
Так как мы кликаем по элементу списка, то в селекторе this содержится элемент списка то есть li , у него мы берем значение атрибута class и с помощью метода split разбиваем название класса на несколько частей, границей является пробел (т.е. если класс был «all active» то после разбиения мы получаем массив из «all» и «active»). А уже далее методом slice выбираем первый элемент массива (в нашем случае «all»), и записываем получившийся результат в переменную filterClass . Если пробела не было то название класса не измениться.
Далее проверяем если в переменной filterClass строка all , то методом .find выбираем все элементы с классом portfolio-item2 из массива $data , который мы рассматривали выше. Выбранные элементы (а это все элементы списка, то есть все картинки) помещаем в переменную filteredData .
В противном случае, если filterClass не равна all , то в переменную filterData поместим не все элементы списка, а лишь те у которых атрибут data-type совпадает с классом категории. Короче говоря элементы только одной категории.
И в конечном итоге полученную переменную передаем в библиотеку jquery quicksand , которая и производит фильтрацию картинок. Это все что касается фильтрации.
Теперь, что касается увеличения изображения в всплывающем окне. Здесь все гораздо проще.
1 | jQuery("a"
)
.prettyPhoto
({
|
Отслеживается клик по ссылке, у которой атрибут rel начинается с prettyPhoto . После чего в дело вступает библиотека prettyPhoto , и изображение чудесным образом увеличивается. Кстати, мы также передаем несколько параметров. Такие как скорость анимации — быстрая, задержка у слайд шоу — 5 секунд, тема оформления Facebook (всего 5 тем они находятся в папке images/prettyPhoto), а также запрещаем показ названия картинки и увеличение картинки при наведении мыши. Полную документацию по prettyPhoto можно найти
Чтобы оставаться в курсе свежих статей и уроков подписывайтесь на
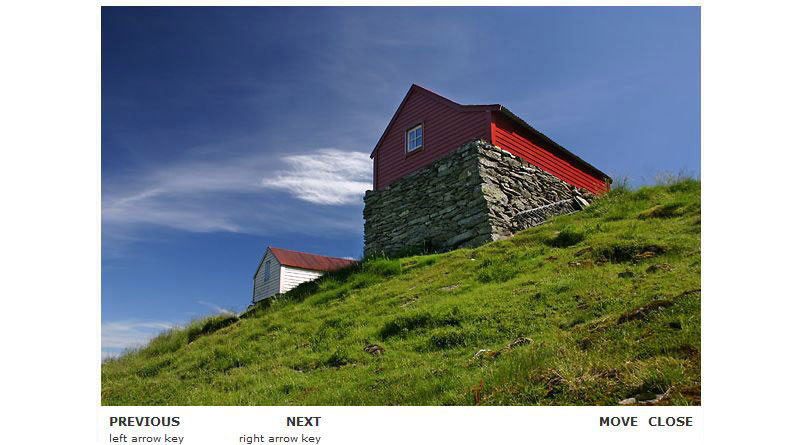
Since usually the best galleries are created in jQuery, we’ve mainly focussed on jQuery type sliders, but there are a few simple CSS galleries as well.
This collection has been organized into five main categories so you can easy switch to your preferred section. Before we start, we wanted to tell you that it’s up to you to go for a free or premium solution.
We did find quite a few free quality image solutions, that you will enjoy. Of course, with premium resources – there were some galleries that simply blew us away.
Just go through the collection and find the best image solution for your needs. If it’s a personal project, surely you will not want to spend any money. But on other hand, if it’s a freelance job, maybe it’s worth spending a little money to really leave an impact on your client and save lots of time at the same time!
I guess what I am suggesting is to always look at how much time it takes for you to modify, install, or setup a free solution. If you aren’t as skilled or it’s time consuming – definitely look into pre-made code and inexpensive but high-quality tools like these.
jQuery Image Slideshows
Below you will find all the best jQuery slideshows. Usually slideshows are used on top of the website to present the most important parts in the most fashionable way.
1. AviaSlider
5. Sequence JS (Free)

Sequence is a JavaScript slider based on CSS framework.
8. Slideshow 2 (Free)

Slideshow 2 image gallery
Slideshow 2 is a JavaScript class for Mootools 1.2 to stream and animate the presentation of images on your website. Please visit their website for a full feature list.
9. JavaScript TinySlideshow (Free)

Very simple image slider solution.
This dynamic JavaScript slideshow is a lightweight (5kb) and free image gallery / slideshow script.
You can easily set it to auto-display the images, set the scroll speed, thumbnail opacity or to disable thumbnail slider. I wanted to include it in this collection because it is so lightweight. Click here to download this slideshow and see a live preview.
jQuery Image Galleries
In this section you will find Image Galleries. They are best suitable for portfolios, but can also be used in blogs. So let’s dig in.
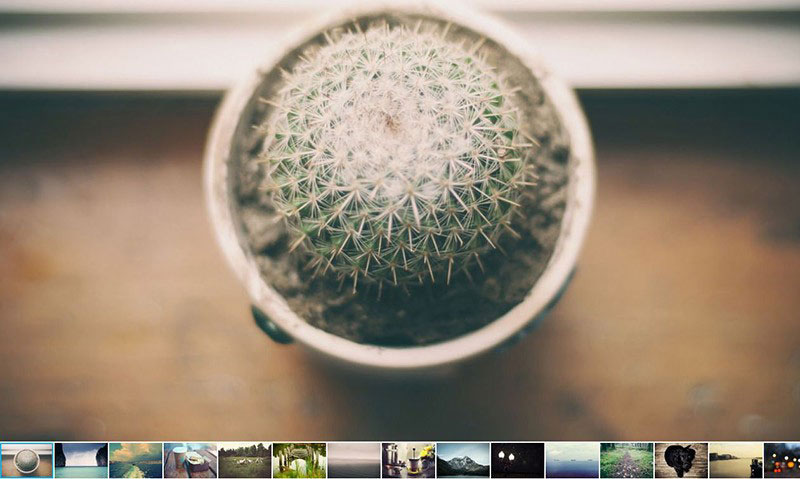
10. Galleria

12. Visual Lightbox

16. Unite Gallery

17. Auto Generating Gallery

18. HighSlide JS
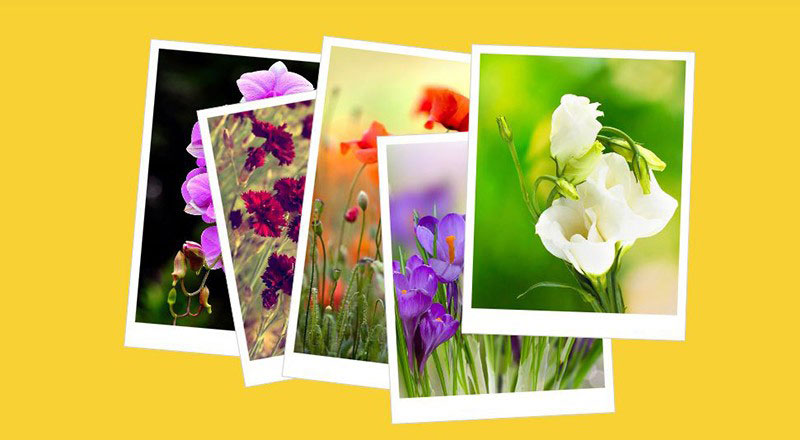
19. Flat-styled Polaroid gallery

jQuery Image Sliders
This section is dedicated to all the best and most beautiful sliders, booth premium and free. They do a similar job as the Slideshows, but can emphasize content holders.
20. Touch Enabled RoyalSlider
21. LayerSlider

LayerSlider Responsive jQuery Slider Plugin.
22. UnoSlider

23. Master Slider

Master Slider – jQuery Touch Swipe Slider
24. Wow Slider
26. Accordion Slider

Accordion Slider – the best jQuery accordion slider on the market.
27. Fotorama image slider
It is a simple way to show your pictures or images, but powerful enough to blow you away. It’s free to use. Check it out .
28. All in One Slider

29. Blueberry Image Slider
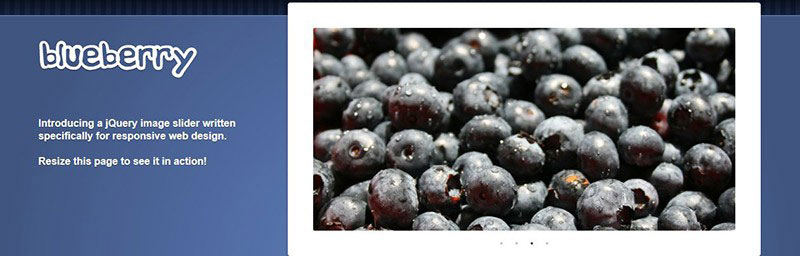
Blueberry jQuery image slider
Blueberry image slider is a jQuery plugin, that was developed specifically for responsive web design. Blueberry image slider is an open-source project, based on a 1140px grid system from cssgrid.net. It’s simple and at the same time an excellent free option.
I’m sure you will like it as much as I do. Check the live preview and download option .
30. RhinoSlider

Rhinoslider slider- The most flexible slider
34. MightySlider

35. Fullscreen Slit slider

37. Cube Portfolio – Responsive jQuery Grid Plugin

38. Slideme

Slideme jQuery slideshow
This jQuery plugin is great for the top of the website, to present your work or say more about you.
Slideme has got full documentation and a tutorial how to set up your slider, for every type of device individually. Design is fully responsive with CSS3 animations. It is easy to setup and provides a public API.
Slideme is free to use and definitely worth a look. Check out the demo here.
39. PgwSlider

Pgw slider is a jQuery slider,\ that is designed for showcasing your images. This slider is fully responsive. It is lightweight and all-browser compatible. Pgw slider is also SEO friendly.
This slider is very suitable for news or blogging websites as it can show your most recent post or articles.
40. All Around Content Slider

41. Lens Slider

Lens Slider jQuery and WordPress plugin
Lens Slider is an open-source project and so, fully customisable. Slider uses very simple HTML markup of an unordered list. Images are shown as you can see in the screenshot. No other option is available. Lens Slider is also available as a WordPress plugin and free to use.
The most suitable usage would be for products, services, or ateam presentation.
Check it out here.
42. Gridder

Gridder jQuery and Ajax plugin
Gridder is an awesome slider for showcasing your work. Gridder kind of mimics Google image search. To view the larger picture you click on a thumbnail and it expands. This is a great way to show a large number of images at the same time.
Gridder is available as a jQuery or Ajax thumbnail previewer. It is an awesome free solution for your next portfolio project.
For jQuery live preview check here. If you want Ajax click here.
43. Barack Slideshow 0.3

Barack JS- JavaScript slideshow
Barack Slideshow is an elegant, lightweight slideshow written in JavaScript. This slideshow can operate with vertical, horizontal, and irregular lists. The images are preloaded with MooTool Assets. To keep your code clean, you should check the CSS code. This means changing some parts if needed.
Barack Slideshow can be used as a portfolio showcase, product list, or even for listing your clients.
Here you can find a demo and test different options.
44. jQZoom Evolution

JQ Zoom Evolution
JQZoom is a JavaScript image magnifier, built on top of the popular jQuery JavaScript framework. jQZoom is a great and really easy to use script to magnify parts of your image.
This image magnifier is the most suitable for online stores and restaurants menus.
Find the documentation and demo here.
45. Multimedia Portfolio 2

Multimedia Portfolio 2-jQuery slider
Multimedia Portfolio 2 is a jQuery plugin that can automatically detect the extension of each media file and apply the appropriate player. It supports images and videos. Multimedia Portfolio uses simple HTML markup and it’s easy to use.
This slider is best suitable for showcasing products, services, and even news.
46. jQuery Virtual Tour

jQuery virtual tour
jQuery Virtual tour is an extension of the simple panorama viewer. This jQuery virtual tour allows you to transform some panoramic views into a virtual tour! It’s a great plugin that is worth looking at.
47.jQuery Vertical News Slider

Vertical News slider – jQuery plugin
jQuery Vertical News slider is very useful for websites that want to show some news or marketing campaigns on their sites. It’s responsive and uses CSS3 animations. Vertical News slider also allows you to fully customise the style of the slider.
48. Multi Item Slider
CSS Based Galleries
We have come to our last section, where you will find the best pure CSS Based Galleries. They may not be as popular but are sure worth a try. See it for yourselves.
49. HoverBox Image Gallery

HoverBox Image Gallery
HoverBox Image Gallery is basically a super light-weight (8kb) roll-over photo gallery that uses nothing but CSS. For faster loading it only uses one image for thumbnail and roll-over preview. All major browsers are supported. HoverBox Image Gallery is free to use for your own projects.
It is best used as a photography showcasing for photographers, any type of portfolio and restaurant menus.
50. CSS Image slider with 3-D transitions

51. CSS3 Animated Image Gallery
53. Pure CSS3 Image Gallery

Conclusion
I have to say I really enjoyed researching these plugins. We found amazing sliders that will, hopefully, help you to work on your next project more efficiently. There’s something for every situation here.
There are so many amazing sliders and slideshows that it’s hard to decide what to pinpoint. But in my opinion you should definitely check out Gridder slider, because it’s really amazing what it can do, especially for free, so it’s a win-win situation.
And you definitely should not forget Slidea . Yes it’s a premium slider, but it carries so much value it’s well worth the investment!
If you enjoyed our article, comment, share it with your friends, and tell us if we missed your favorite slider.
Which is your favorite gallery plugin? We would love to hear your experiences!
В нашей коллекции скриптов вы сможете найти небольшие, но очень полезные и функциональные плагины для своего сайта. Обращаясь к средствам jQuery Gallery , легко организовать галерею цифровых фотографий с приятным дизайном, с возможностью прокрутки, масштабирования, просмотра миниатюр и со множеством других полезных функций. Имеются как строгие решения для профессиональных сайтов, так и яркие, с анимацией и другими спецэффектами — для развлекательных проектов.
С помощью средств jQuery изображения можно просматривать, не перезагружая страницу и не увеличивая поток трафика. Представленные плагины позволяют оптимизировать подгрузку изображений в реальном времени, представить галерею в удобном и приятном для пользователя виде. Благодаря удобству настроек и множеству доступных решений ваша собственная jQuery-фотогалерея может теперь выглядеть точно так, как вы пожелаете. Представленные скрипты протестированы на разных платформах и отличаются прекрасной совместимостью.
Всем привет! В этой статье мы рассмотрим, как сделать красивую и удобно сортируемую галерею на JQuery .
Красивая, удобно сортируемая галерея – это прекрасная вещь для вашего сайта, которая будет радовать вас и ваших посетителей. Сегодня мы рассмотрим очень простой в установке и настройке плагин для библиотеки JQuery – Filterizr .
Несмотря на простоту использования, плагин достаточно легкий и эффектный. Давайте рассмотрим его подробнее.
Демонстрация
Чтобы посмотреть, как работает плагин, зайдите на официальный сайт , и вот он уже перед вами!
Вы можете выбрать сортировку по городам, природе, промышленности, рассвету, закату или показать все фотографии(значение по умолчанию). Присутствует кнопка Shuffle , которая позволит вам перемешать изображения. Кнопки ASC и DESC сортируют картинки по возрастанию и убыванию соответственно. Если вы хотите найти какое-то изображение по позиции или описанию, выберите нужный пункт в выпадающем списке и введите запрос в поле поиска. При наведении на изображение мышки картинка превращается из черно-белой в цветную.
Установка
Чтобы скачать библиотеку, нажмите кнопку Download или используйте NPM :
Npm install filterizr
Плагин уже настроен из коробки, но, если вы хотите переписать значения по умолчанию, вы можете либо:
1) Передать объект с параметрами в конструктор JQuery
Var filterizd = $(".filtr-container").filterizr({
// параметры
})
2) Переписать параметры, используя setOptions() метод в объекте Filterizr .
Filterizd.filterizr("setOptions", {
// параметры
})
Параметры
Параметры по умолчанию:
Options = {
animationDuration: 0.5,
callbacks: {
onFilteringStart: function() { },
onFilteringEnd: function() { }
},
delay: 0,
delayMode: "progressive",
easing: "ease-out",
filter: "all",
filterOutCss: {
opacity: 0,
transform: "scale(0.5)"
},
filterInCss: {
opacity: 0,
transform: "scale(1)"
},
layout: "sameSize",
selector: ".filtr-container",
setupControls: true
}
Более подробные инструкции и описание каждого параметра вы можете найти на